+86-25-8470-5507


Views: 0 Author: Site Editor Publish Time: 2026-07-02 Origin: Site


An unmaintained fluid extraction unit isn't just a nuisance; it is a serious liability. It causes hazardous spills on your shop floor. It slows down service bays during peak hours. It significantly shortens your equipment lifespan. These issues cost you time and money.
Whether you operate a high-volume garage or maintain a private fleet, proper upkeep of your fluid handling equipment ensures vital environmental compliance. Routine care keeps operations running smoothly. It prevents unexpected downtime during busy repair shifts. Every service center relies on efficient waste management to remain profitable and safe.
This guide covers the essential maintenance protocols you need. We explore component-level evaluations and decision frameworks to keep your fluid evacuation systems operational. You will discover practical methods to inspect seals, clear debris, and choose correct solvents. Finally, you will learn exactly when you should upgrade your setup for maximum efficiency.
Failing to maintain fluid extraction tools leads to severe operational bottlenecks. Degraded suction directly reduces your draining speed. Mechanics waste valuable minutes waiting for slow tanks to empty. Ignored leaks create extreme slip hazards across your shop floor. Furthermore, improper hazardous waste handling invites steep regulatory fines from environmental agencies. You face major penalties if inspectors find weeping joints or overflowing catch pans.
A well-maintained Oil Drainer exhibits specific performance markers. It should hold vacuum pressure consistently without random drops. Hoses must remain clear and pliable to the touch. Waste fluid must transfer into bulk storage without weeping at connection points. When these elements work together, mechanics complete oil changes faster. They experience zero unexpected fluid blowouts.
You must view maintenance as a critical risk-mitigation protocol. It is never just a simple cleaning task. Diligent upkeep directly protects shop efficiency. It ensures mandatory safety compliance. A proactive approach stops minor seal wear from becoming a catastrophic floor spill. You safeguard your employees while extending the functional life of your tools.
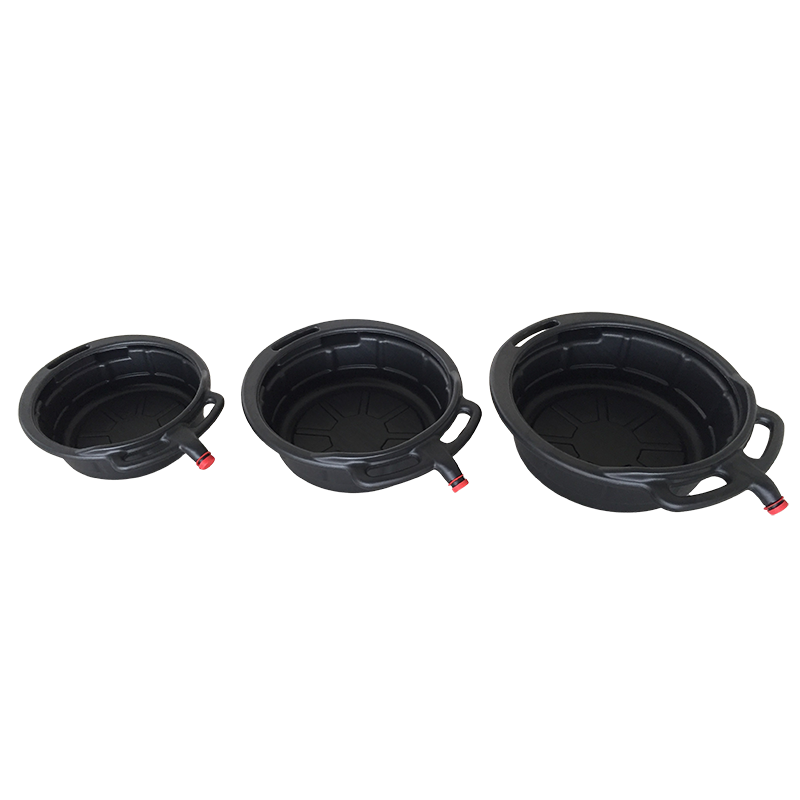
Best practices dictate removing surface oil from the funnel, tank body, and casters every single day. Use absorbent shop rags at the end of each shift. This stops dirt from binding to the oily surfaces. Heavy dirt accumulation hides structural cracks. It also creates a highly unsafe workspace. Mechanics slip easily when they handle greasy tank handles or push oily caster wheels.
You must actively clear the strainer and catch pan. Technicians often drop metal shavings, drain plug gaskets, and debris into the funnel. You must remove these solid items safely before they enter the main reservoir. If gaskets fall into the lower tank, they block the internal discharge tube. A blocked discharge tube makes emptying the tank impossible. Use a magnetic retrieval tool to grab metal parts quickly.
You must choose your cleaning solvents carefully. Avoid harsh, corrosive chemicals like pure acetone or aggressive brake cleaners. These volatile liquids rapidly degrade plastic sight reservoirs. They destroy essential rubber gaskets. You should utilize mild, seal-safe degreasers for routine cleaning. Citrus-based cleaners break down exterior sludge safely. They protect the structural integrity of your Workshop Oil Drainer.
Evaluating the structural integrity of extraction hoses prevents messy workplace accidents. You must look closely for dry rot along the hose jacket. Bending the hose reveals hidden cracks. Kinking restricts fluid flow and strains the internal vacuum. You must also check for internal sludge blockages. Thick sludge deposits drastically reduce your extraction speed. Flush the hoses quarterly using a safe solvent.
Pneumatic drainers require strict valve and regulator checks. You must assess the safety relief valves regularly. Check the air inlet regulators for accurate pressure readings. Inspect the brass ball valves for smooth operation. You must ensure no pressure bleed-off occurs during operation. Listen closely for hissing sounds around the fittings. A hissing valve indicates a failing internal seal.
You must identify the wear life of all rubber seals. O-rings do not last forever. They turn brittle after constant exposure to hot synthetic fluids. Establish a proactive replacement schedule. Do not wait for a complete vacuum failure. Do not wait for a hazardous leakage. Swap main O-rings annually to guarantee perfect system pressure.
Caster wheel upkeep keeps your equipment mobile. Fully loaded tanks weigh well over a hundred pounds. You must lubricate the wheel bearings monthly. Clear discarded zip-ties, rag threads, and debris from the axles. An immobilized tank becomes a severe tipping hazard. Free-rolling casters keep your equipment safe to maneuver around tight service bays.
| Component | Inspection Frequency | Common Failure Signs | Action Required |
|---|---|---|---|
| Extraction Hoses | Weekly | Dry rot, stiff sections, weeping ends | Replace hose; check clamp tightness |
| O-Rings & Seals | Monthly | Vacuum loss, visible cracking, hissing | Install new lubricated seals |
| Safety Relief Valve | Monthly | Sticking, failing to vent overpressure | Clean threads; replace if springs fail |
| Caster Wheels | Daily/Weekly | Grinding noises, tangled shop debris | Remove debris; apply spray lubricant |
Regular maintenance of the discharge system ensures safe, compliant fluid offloading. When your tank fills up, you must transfer its contents into bulk waste tanks. Seamless fluid transfer requires perfectly functioning pneumatic push valves. If the discharge hose cracks, pressurized fluid sprays across your walls. Inspect the discharge nozzle weekly. Ensure the shut-off ball valve rotates fully without excessive force.
You must avoid mixing different shop fluids. Mixing engine coolants or synthetic solvents in an oil-only tank creates massive operational risks. Harsh solvents damage internal anti-rust linings. Coolant introduces water into the tank, promoting internal corrosion. Furthermore, mixed fluids complicate your recycling relationships. Waste management companies often refuse cross-contaminated fluids. They may charge you severe chemical separation penalties.
Align your equipment upkeep directly with local waste-handling regulations. Organizations like the EPA and OSHA set strict standards for hazardous liquid containment. You maintain compliance by operating a completely leak-free system. Keep daily logs of your fluid transfers. Train your technicians to report minor drips immediately. Proactive containment strategies keep inspectors satisfied and protect your local environment.
You must regularly calculate the maintenance expenses of an aging unit. Frequent O-ring replacements add up quickly. Cracked hoses require expensive custom fittings. Time spent fixing a broken regulator is time away from billable customer repairs. You must compare these ongoing repair costs against the price of investing in brand-new equipment. Sometimes, repairing an old tank drains your operational budget faster than buying a replacement.
When evaluating a replacement, prioritize features explicitly designed to reduce maintenance overhead. Look for heavy-gauge steel construction. Thin metals dent easily and lose vacuum integrity. Standardized NPT fittings are crucial. They allow you to buy replacement parts at any local hardware store. Accessible clean-out ports save massive amounts of time when flushing internal sludge.
You need to audit your current fluid handling equipment today. Inspect the lower basin for structural rust. Test the pneumatic system for permanent vacuum loss. Check if the manufacturer still produces replacement parts for your model. If you face obsolete parts and rusted welds, transition immediately to a commercial-grade solution. A modern unit restores your shop’s daily efficiency.
| Scenario | Recommendation | Reasoning |
|---|---|---|
| Worn O-rings or a clogged strainer | Repair | Inexpensive parts; takes less than 15 minutes to fix. |
| Cracked plastic sight tube | Repair | Standard replacement parts are usually readily available. |
| Deep structural rust on the main tank | Replace | High risk of pressurized rupture; cannot be safely patched. |
| Obsolete model with failing regulator | Replace | Sourcing custom parts wastes billable time and money. |
Consistent maintenance of your fluid extraction tools ensures exceptional shop safety. It maintains your operational speed during busy seasons. It guarantees strict regulatory compliance with environmental agencies. Simple daily wipe-downs and routine hose inspections prevent catastrophic failures. You avoid hazardous floor spills completely.
Treat your fluid extraction equipment as a highly critical shop asset. Regular inspections clearly save you money over time. However, recognizing when a unit sits beyond economic repair prevents costly workplace accidents. Knowing when to upgrade is just as important as knowing how to clean a catch pan.
Implement a weekly inspection checklist for your current equipment immediately. Train your mechanics to check seals and valves every Monday morning. If your current unit constantly fails to hold pressure, take action. Browse commercial extraction solutions if you can no longer find replacement parts for your aging setup.
A: We highly recommend mild, non-corrosive degreasers like citrus-based solutions. Avoid using highly volatile brake cleaners or pure acetone. These aggressive chemicals quickly degrade rubber O-rings. They also melt plastic sight tubes and ruin the internal anti-rust lining of your tank.
A: Replacement frequency depends heavily on your daily usage and shop environment. Visually inspect your hoses monthly. You must replace them at the very first sign of exterior cracking, abnormal stiffness, or weeping fluid near the connection joints.
A: Suction loss usually stems from three common maintenance failures. You likely have compromised rubber O-rings, a heavily clogged extraction tube, or a failing air regulator valve. Inspect all connection points for hissing sounds to locate the exact leak.
A: No. Leaving waste fluid sitting permanently causes thick sludge buildup. It also promotes water condensation inside the steel tank. We strongly recommend regular offloading into bulk secondary containment. Emptying the tank promptly prolongs your equipment's internal lifespan.


